My next step was taking this rough draft to my contractor for an estimate of what this might cost. There were structural issues that needed resolving.

Until my contractor knew the approximate room size he could not get the engineering on the structural done. The three stalls of the barn would need to be torn out, and the central wall running length-wise thru the barn would need to be removed and spanned. Richard's concept called for a 42" wide hallway running down one side of the room so my contractor had the engineer design 2 main beams (16" x 4" gluelam) to run horizontally at the 1/3rd and 2/3rd points of the room, as well as a longitudinal beam connecting to the horizontal beams that would pick up the load from the previous long wall. This was kind of major, but resulted in a very stout structure. The hayloft above was already on 12" x 2" joists on 12" centers... this same design was carried across the rest of the ceiling. I wanted to have a pool table in the hayloft (as well as future LP storage), so the ceiling needed to be very strong.

My contractor then actually began the demolition and structural investigation... prior to figuring how the structural beams would work. When the final structural issues were settled, Richard had Chris Huston get involved to do the detailed construction drawings. I might recommend reading Chris's bio, to understand his credentials. He has possibly a unique background in music, the production of music, pro studio design, acoustical theory, and 2-channel room design. He isn't guessing about how things will sound with my money... he knows from science and experience. Every acoustical component in my room has already been used by Chris in other projects.
Like many audiophiles with a little knowledge and experience... part of me felt I could figure this out. There are other acoustical design products/services out there to choose from... but the closer I looked, the more it appeared to me that other approaches were actually the application of tweaks to existing spaces, whereas Rives was fundamental in its stance and had more actual room design experience. Rives can 'band-aid' a room... but it is not their first choice.
Chris took about 10 days to complete the first draft of the construction drawings for me to review. He e-mailed and sent me a hard copy of the plans... as I looked them over I got pretty excited... here was what I had been looking for. I ended up building pretty much exactly what that first draft showed. When Richard and I had gone over concepts we had figured a few things out.

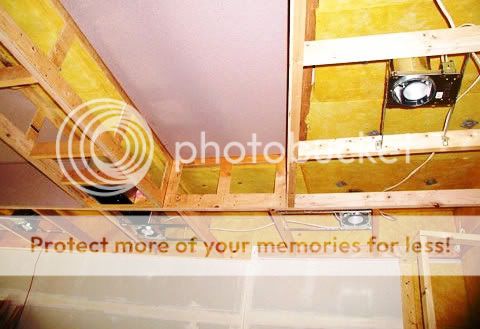
The above concept plan is where Richard and I had taken things. Chris took this and went to the next level. The existing ceiling was 12" x 2" joists on 12" centers. It had been constructed to be a hayloft, so it was very substantial. A new ceiling was added above what had been the horse stalls to match the existing one. All the electrical for lights and power were installed... then R-39 insulation was stuffed into the gaps between the joists in the ceiling. R-19 insulation was installed in all the walls, which were constructed of 2" x 6" studs on 8" centers. There were 6 large posts holding up the large beams; these posts became part of the walls. In all, a very stout structure.
Chris specified a sandwich of 5/8" sheetrock, 1/2" soundboard, and 5/8" sheetrock on the walls and ceiling for the whole room. Everything would be built inside this cocoon. Half the floor was already 6" of concrete over 6" of gravel. We extended this to the whole floor. Since this was a separate structure from the main house, sound isolation was not particularly critical. In addition, since this would be a pretty large space, the walls needed to be very solid to 'hold' the bass energy... in a relatively small room you might typically 'soften' the walls to keep the bass from getting too boomy.
The focus of the room and most unusual feature is the large center diffuser panel in the front of the room. This curved panel protrudes about 18" into the room at the center point. It is constructed of ¼" plywood over a stud wall and lined on the inside and back wall with 2" fibreglass. This plywood is then covered in maple veneer. Above and below of the diffuser panel are 12" soffits that follow the same curvature. This diffuser captures all the energy of the room but won't beam any first reflections. The adjacent fabric covered bass baffles create a perfect balance of absorption and diffuse reflection... retaining phenomenal soundstage layering and detail, while eliminating any smearing of detail.

Next, he took the front tapered side walls and made them a huge bass trap on each side. He lined the cocoon wall corners with 2" fibreglass, pulled the false wall corner out about 18", and then tapered the front wall too (so it tapers to the corners of the large center diffuser). The final drawings show a false wall of fabric-covered 1" fiberglass. This creates a huge (it extends about 10 feet down the side wall and 5 feet into the front wall and is floor to ceiling) bass trap (and absorptive surface) on the front sidewalls and sides of the front walls; it also eliminates the 90 degree corner. The size of this bass trap is much larger than any tube trap and is built into the room.
Chris added hardwood floor on the front 10 feet of the room, for added energy retention... a thick carpet and pad is specified for the floor on the rear 2/3rd of the room. The speakers will be positioned at the forward edge of the hardwood so their first floor reflections are off the carpet.
On the ceiling, Chris designed a system of soffits and chambers. The soffits drop down from the 11 foot ceiling about 14" and serve as one large bass baffle. There are 6 chambers, three per side. The sides of these chambers have holes lined with fabric covered 1" fibreglass to allow the bass frequencies to enter and dissipate inside. The chambers break up any standing waves and eliminate first reflections off the ceiling. This whole soffit system is one very large bass trap.
As a final touch, Chris designed four 18" x 48" x ¼" hanging diffuser panels into the center two chambers to further reduce first reflections. These angled diffusers 'trap' direct sound from the speakers, but allow room energy to be retained.
The center of the side walls on each side contain vertical diffuser panels that Richard had specified in his concept above, and the rear side walls have floor to ceiling CD racks that will hold almost 5000 CDs or SACDs. These diffusers are semicircles of hardwood plywood filled with fibreglass. They diffuse any direct sound, but don't resonate.
There are 3 sections of CD racks that step towards the center of the room and eliminate any parallel surfaces. The shelves with CDs are ideal diffusers. The rear wall has LP shelving that tapers toward the center on each side... holding almost 3000 LPs. In the rear corners and to the inside of the LP racks are floor-to-ceiling built-in bass traps... which are cavities lined with 2" fibreglass, with fabric-covered 1" fibreglass on their outside surface.
The door is solid and uses weather stripping to keep noise and air from entering or leaving. I am a stickler for a door that is tight, looks good, and closes nicely. This door has a solid oak bottom jam and a 'trick' gasket that uses a cam mechanism to lower onto the jam when the door closes... neat.
I like my sources to be on the side of the room, and the (monoblock) amps to be between the speakers. My turntable weighs 550 pounds; I have installed a 24" x 24" piece of Travertine tile directly on the concrete for the turntable on the left side of the room alongside the left hand diffuser panel. The air compressor for the turntable is in the attic above the room where it can't be heard. We installed 2" conduit for the turntable air and control hose in the wall.
My digital source, passive switchbox, and phono stage will be located on a Zoethecus rack alongside the turntable, in front of the left diffuser. The amps and passive remote volume control are located between the speakers. There is a 7 meter balanced interconnect running from the passive switchbox on the left side to the passive remote volume control between the speakers. This interconnect is raised off the hardwood floor by ceramic cable elevators.

HVAC, lighting, electrical, and other system design
ation, air conditioning) is designed into the room by Rives to be 'whisper-quiet.' It is dedicated to this room only, and has the fan/heat unit in the attic above the hallway outside the room. This unit is mounted on a vibration absorbent pad... even when standing directly under it in the outside hallway there is no noise or vibration. The air exchanger unit is mounted outside the Barn on the opposite side from the room, so when engaged there is no sound detectable from inside the room.
This HVAC system is a closed loop... the main air duct emerges from the fan/heat unit and goes through an electronic air purifier, then is separated into four outlet ducts... each of which travel to four different outlet vents on the ceiling. Each of the four outlet ducts has three 90 degree bends to reduce any fan noise. With four outlet ducts the velocity can be reduced. There are two cold air return vents located at the bottom of the front bass traps (these cold air return ducts act as part of the bass trap). These cold air returns are then ducted back to the heat/fan unit. With the door closed and no music playing the room is completely quiet... not a sound... when the HVAC unit comes on you can just barely tell it is on... any music or conversation makes it impossible to hear the HVAC.
I recently added a vent and cold air return in the upstairs rec room to reduce the air pressure/velocity in the listening room... this reduced the already very low noise about 80%, to just about nothing. Since I'm the only user of this upstairs room (except my kids when playing pool), I have no sound leakage issue with this.
The problem with having a room with truly NO outside noise is that there is nowhere to hide. Any noise is major... but the benefits of any reduction in ambient noise is more musical information is uncovered... ambience from the music is greatly increased.
A completely separate 70 amp, 220 volt electrical service was run to the room with its own dedicated panel. This is taken from the home electrical panel in the garage, just after the meter. It is upstream of any other panel. In the future I may attempt to have a totally separate electrical service and transformer from the street for the room panel, but I didn't want to tackle the politics of that at this time. All the motors and such for the house are on their own separate sub-panel, and when these motors cycle on I get no noise of any kind through the room-dedicated panel.
A 'home run' goes from the meter to the dedicated panel outside my room in the hallway. There is no main breaker in the dedicated panel, and it is the highest quality panel I could find. This panel has its own quite robust dual grounding rods. There are 11 dedicated circuits for the room, all with 'home runs' of 10 gauge Romex run to JENA Labs 'deep-immersion cryo'ed' duplex outlets... all grounded and run with the same phase.
I have installed the wall panel in such a way as to allow for easy installation of an EQUI=TECH 10kv Wall Cabinet System in the future. Rives Audio recommends this approach since it allows for up to a 12dB reduction in noise. This is what Chris Huston specifies for the Pro Audio studios he designs. For now, the budget won't allow it.
The electrical service to the barn, with all lights, 'dirty' outlets, and HVAC, is completely separate from the dedicated panel. The lighting system for the room consists of four separate lighting 'zones': one for the media shelves (seven recessed cans), one for the side diffuser panels and source shelves (two recessed cans on each side), one for the track lighting just above and behind my listening position (three halogen spots on each side), and one for the front of the room above the speakers and front diffuser panel (seven recessed cans). I aim two of the track spotlights directly over my shoulder at the listening position to give me great reading light with no shadows. One track spot is aimed at the turntable position, and the others bring more light to the upper media shelves for an easy selection of recordings.
These four zones are tied together with a Lutron GRAFIC EYE 2404 dimmer control. This allows for four scenes, and all off and all on, as well as any position in between. It is a totally quiet, very simple to use control that is programmed into my Philips Pronto remote. I can dim each zone separately on four different 'scenes' to get just the right amount of light for every situation. It transitions between scenes very smoothly.
To me, getting the lighting correct is one of those 'fine details' that can make the enjoyment of the system much better. Typically, the front lighting zone is always off unless I am doing cleaning or set-up of some sort. In fact, for serious listening I typically have all the lights off except two 15 watt 'loose' cans that I put on the floor aimed up at the ceiling directly behind the speakers. These 'up-firing' lights cast a warm glow over the front diffuser panel and ceiling and really enhance the whole musical experience.
I considered the issue of acoustical problems resulting from all these recessed cans and track lighting. I was concerned that the ceiling bass traps might cause resonance with the metal cases of the cans. I had quite a bit of lead tape applied to these cans before the ceiling was buttoned up to insure it would not become a problem. Once my system was in the room, the first thing I did was to play a bass 'boom' track over and over and search for any resonance. I found three of the cans did have slight ringing from the trim, and secured them. I went around and put my ear close to each light. In the near future I'll get a more sophisticated low frequency sweep, to ensure I have found all possible sources of unwanted resonance.